

 What customers say


.webp)
.png)
.png)
%20(70).png)
%20(67).png)
%20(71).png)
%20(1126%20x%20658%20px)%20(4).png)
-1.jpeg)


.svg)


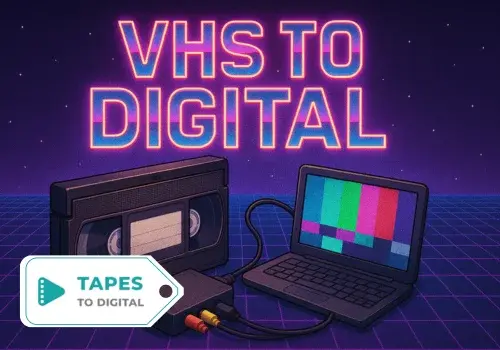
Introduction: Why Digitise VHS Now?
VHS tapes, once the cornerstone of home video recording, are now relics of the past. Over time, these tapes degrade, leading to a loss in video and audio quality. Digitising VHS tapes ensures the preservation of cherished memories, making them easily accessible and shareable across modern devices. Whether it's a DIY project or seeking professional services, converting VHS to digital is a step towards safeguarding your personal history.
DIY Conversion: Equipment, Software, Costs, Risks
Equipment Needed
- VCR Player: A functioning VHS player is essential. These can be sourced from online marketplaces or second-hand stores.
- Video Capture Device: USB capture cards connect the VCR to your computer. Brands like Elgato or Diamond VC500 are popular choices.
- Cables: RCA cables (red, white, yellow) or S-Video cables, depending on your VCR's output.
- Computer: A PC or Mac with sufficient storage and processing power.
- Software: Programs like OBS Studio or VirtualDub facilitate the recording and conversion process.
Software Options
- OBS Studio: A free, open-source software suitable for video recording and live streaming.
- VirtualDub: Ideal for capturing and processing video files, especially for AVI formats.
- VCR Player: $50 - $150
- Video Capture Device: $20 - $100
- Cables: $10 - $30
- Software: Free to $50, depending on the choice
- Time-Consuming: Real-time recording means a 2-hour tape takes 2 hours to digitise.
- Technical Difficulties: Issues like audio-video sync problems or software glitches can arise.
- Quality Loss: Improper setup can lead to degraded video quality.
- Equipment Compatibility: Modern computers may lack necessary ports, requiring additional adapters.
Professional Conversion Process Overview
Opting for a professional service like Tapes To Digital offers a streamlined and efficient solution.
Process- Consultation: Discuss your needs and the number of tapes to be converted.
- Drop-off or Mail-in: Send your tapes to the service provider.
- Digitisation: Experts use high-quality equipment to convert tapes to digital formats.
- Editing and Enhancement: Optional services like colour correction, noise reduction, and chapter creation.
- Delivery: Receive your digital files via USB, DVD, or cloud storage, along with the original tapes.
- Quality Assurance: Professional-grade equipment ensures optimal video and audio quality.
- Time-Saving: Frees you from the lengthy DIY process.
- Additional Services: Options like tape repair, editing, and custom packaging.
Pros and Cons Comparison
| Aspect | DIY Conversion | Professional Service |
|---|---|---|
| Lower upfront cost, especially if equipment is already owned. | Higher cost per tape but includes all services. | |
| Time Investment | High; real-time recording and potential troubleshooting. | Low; professionals handle the entire process. |
| Quality | Variable; depends on equipment and user expertise. | Consistent high-quality results. |
| Convenience | Requires setup and monitoring. | Hassle-free; drop-off and pick-up or mail-in options. |
| Customization | Full control over the process. | Limited to services offered, but often includes enhancements. |
When to Choose DIY vs Professional
Opt for DIY if:- You have a small number of tapes.
- You're tech-savvy and enjoy hands-on projects.
- Budget constraints are a primary concern.
- You have a large collection of tapes.
- Time is limited, and you prefer convenience.
- You desire the best possible quality and additional services.
Frequently Asked Questions
Q1: How long does it take to convert a VHS tape to digital at home?
A: The conversion process is real-time, so a 2-hour tape will take 2 hours to digitise, excluding setup and potential troubleshooting time.
Q2: Can I improve the quality of old VHS tapes during DIY conversion?
A: While some software offers enhancement features, the improvements are limited. Professional services have advanced tools for better results.
Q3: Is it safe to send my tapes to a professional service?
A: Reputable services like Tapes To Digital ensure the safety and confidentiality of your media throughout the process.
Q4: What digital formats will I receive from a professional service?
A: Common formats include MP4, AVI, or DVD, depending on your preference.
Q5: Do professional services offer editing options?
A: Yes, many services provide editing, colour correction, and other enhancements as part of their packages.
Related Articles
ConclusionConverting VHS tapes to digital is essential for preserving precious memories. While DIY methods offer a cost-effective approach, they require time, effort, and technical know-how. Professional services, though more expensive, provide high-quality results with minimal hassle. Assess your needs, resources, and the value of your content to choose the best method for you.
Ready to preserve your memories? Explore our VHS to Digital Conversion Services at Tapes To Digital. For residents in the Parramatta area, visit our local service page for more information.
